

Resource Center
Introducing the new Strip format for Native Shopping Ads
We are excited to announce the launch of a new format called ‘Strip’ for Native Shopping Ads. This new format is in addition to the already existing formats - Grid, List, and Card.
The Strip format is best-suited for in-content placements. It is slimmer in appearance and is designed to blend seamlessly into the page content. It is available for all the three variants of Native Shopping Ads– Recommendation, Search and Custom Ads.
If you’re new to Native Shopping Ads, click here to learn more.
What’s new in the Strip format?
The renewed layout and design elements of the Strip format enhance your end-user experience; hence you can better monetize your web pages.
Slimmer ad unit (reduced height): In this format, the product information (name, price, ratings, etc.) appears right next to the image. Due to this design, Strip format ads occupy lesser vertical space, and there is more room for the core content on the page.
A more native ad unit-experience: The Strip format ads are borderless, and the product title is black. When rendered on mobile, the swipe interaction is enabled by default. Just like the existing formats, this ad unit too is responsive and adapts to the size of the container it is placed in hence gives a more native experience.
How does the Strip format look on my pages?
Here are some examples of how this ad unit will look like on your webpage.

There’s a swipe-enabled interaction for mobile browsers by default (exclusive to the Strip format).

Getting started
Setting up the Strip format is simple, just like the existing formats of Native Shopping Ads. We have illustrated the process to download and configure the Strip format for Recommendation Ads below.
1) Get the ad code
To begin using the Strip format, you need to download the ad code first. Log in to Associate Central using your account credentials and navigate to Native Shopping Ads home-page under the Product Linking section.

Then, click on the ‘CREATE’ link based on the desired variant you want to use – Recommendation Ads, Search Ads or Custom Ads. If you are new to Native Shopping Ads and want to learn more about the different variants, click here.

Next, you can configure the ad unit behavior by choosing from the available options. These options differ slightly based on the variant you select. The illustration below shows the different configuration options for Recommendation Ads.

Ad Name: Give your ad unit a descriptive name (no special characters are allowed). Try to give a meaningful name like ‘Product Reviews in-content’ or ‘Apparel and clothing, end-of content’ etc. for easy recall.
Tracking ID: You can either select an existing tracking ID or create a new tracking ID. Tracking IDs help you get a granular view of performance in the reports. Please note: Each ad unit you create in this workflow maps to only one tracking ID.
Ad Format: Choose the ad format as ‘Strip.’
Emphasize Categories: You can choose from the available list of categories that you feel relates best to your page/website. These categories serve as relevance hints to the contextual engine to provide the most relevant recommendations for your pages.
Fallbacks: You can choose to give a search phrase as Fallbacks in the ad unit. When there is not enough content signal on the page, search results for the provided phrase will be used to serve the ad, as a fallback mechanism. If you choose not to use any Fallbacks, the ad unit will hide, and the container will collapse in the absence of relevant recommendations, making way for the subsequent elements on the page.
If you expand the Advanced Settings drop-down, you can further see the following option:
Show interest-based ads: If you enable this setting (and Amazon recognizes the users, and it detects a high user signal/purchase intent), then ad units will show recommendations based on your visitor’s recent behavior on Amazon (the products they have browsed recently, added to cart but did not purchase, etc.). These products will be specific to the user visiting the page and will differ from user to user. You can also choose to turn off interest based ads altogether, in which case, ads will always be relevant to only your page content and will be same for all users.
Once you have edited the ad preferences, click on ‘Save and View Ad Code’ button. A popup screen that displays the ad code will appear.
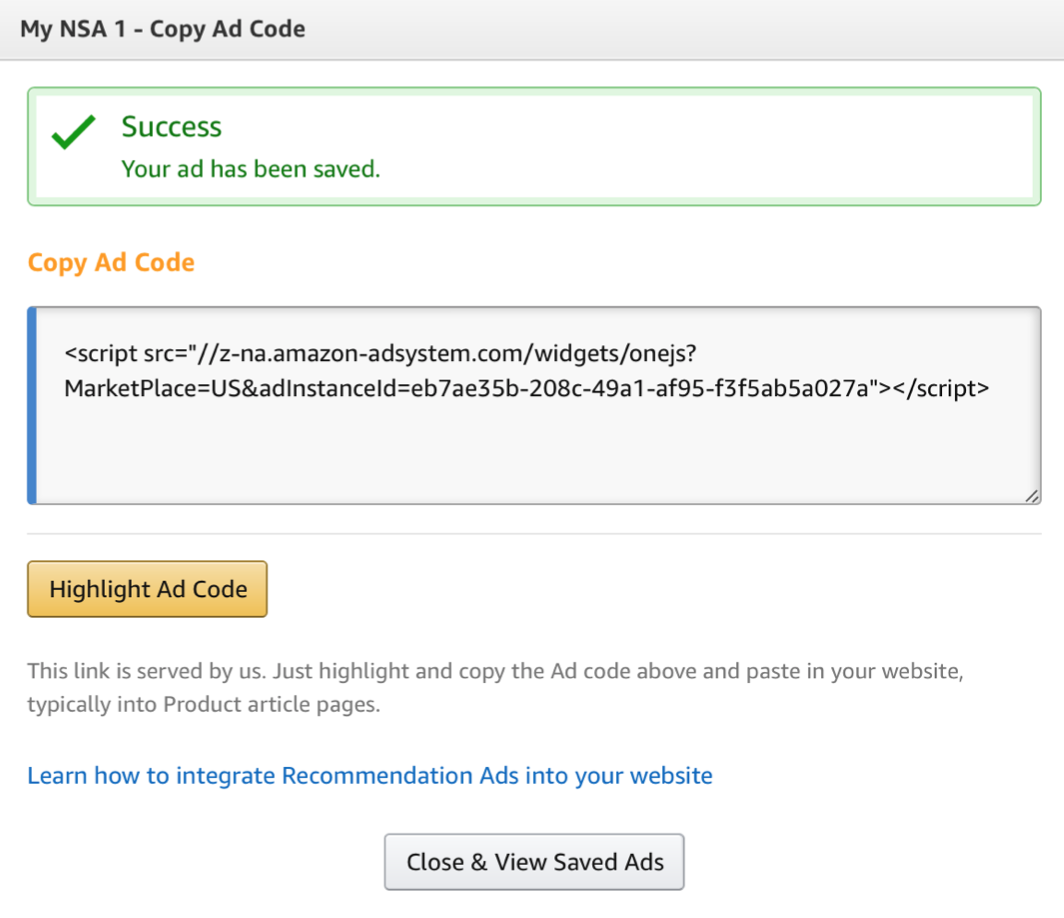
The ad code is now ready; you can copy it and insert it into your pages.
2) Integrate the ad code
You can now paste the ad code directly on your webpage, at the placement where you want the ads to show up. That’s it. You are done.
You can configure Strip format for Search/Custom variants using the same process as above by selecting Search/Custom on the Native Shopping Ads homepage, as given in step one.
If you still have any questions about the new Strip format, click here to read through FAQs.
You can configure Strip format for Search/Custom variants using the same process as above by selecting Search/Custom on the Native Shopping Ads homepage, as given in step one.
If you still have any questions about the new Strip format, click here to read through FAQs.